Our Top Christmas Nail Designs Tutorials of 2023 will get you in the holiday spirit! Whether you’re a fan of whimsical holiday characters or more traditional ornaments, these detailed instructions will help you paint nails that will be perfect for Instagram. Put your best manicure foot forward this holiday season!!
1. Christmas Grinch Themed Nails:

To begin, apply a base coat to shield your nails from damage. Do not proceed to the following step until it has dried entirely.
- Base Coat: Start with a base coat to protect your nails. Allow it to dry completely before moving on to the next step.
- Green Base Color: As a foundational hue, paint your nails a vivid green at Nordstrom. For complete coverage, you might need to apply two coats. Make sure to give each coat enough drying time.
- Grinch Face: Paint the center of your nails with the Grinch’s cheeky smirk using a fine detail brush and red nail color. To make the mouth, use a dotting tool or a toothpick to draw small, upward-curved lines. To make the eyes, just add a few dots.
- Santa Hat: To make the Grinch’s Santa hat look more authentic, paint a thin white line on the tip of each nail, close to the cuticle. After that, join the white trim to the triangular hat shape you just made with red polish.
- Hat Details: To make the buckle, sew a little yellow square onto the underside of the cap. For accuracy, use a tiny brush or a toothpick. Before proceeding, make sure the red polish has dried entirely.
- Finishing Touches: Use a clear top coat to seal your Grinch-themed nails for extra durability and a glossy sheen. You should wait until the details are dry before adding the final layer.
2. Christmas Candy Cane Nail Designs:
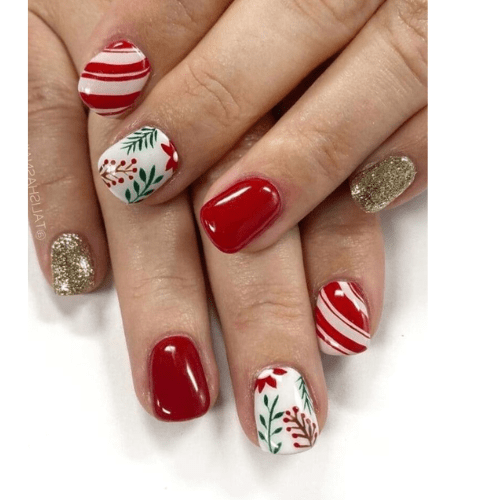
- Base Coat: To preserve your nails, apply a clear base coat and let it dry completely before proceeding.
- White Base Color: Apply a thick coat of white nail paint to every one of your nails. To have a thoroughly covered area, apply two coats and let them dry completely between.
- Candy Cane Stripes: Carefully draw diagonal stripes over each nail using a fine brush or a red nail polish striper to replicate the candy cane pattern. Verify that the stripes are parallel and spaced evenly. Make sure to let the red stripes dry entirely.
- Accent Nail: Pick off a single nail (often the ring finger) to serve as an emphasis. Since this nail will be the backdrop for a candy cane pattern, paint it red.
- Candy Cane Detail: Create the iconic candy cane stripes on the red accent nail using a white polish striper or a small brush. Create a narrow space between each stripe of paint and run them parallel down the nail.
- Curve The Stripes: Carefully curl the white stripes at the accent nail’s tip to make a candy cane shape. This little element makes the whole thing more lively.
- Finishing Touches: To preserve the polish and give it a glossy sheen, apply a clear top coat over the entire design. Do not touch the top coat until it has dried entirely.
- Clean-Up: To refine the candy cane design and remove any extra nail polish, dip a small brush into nail polish remover.
3. Red and White Christmas Nail Designs:
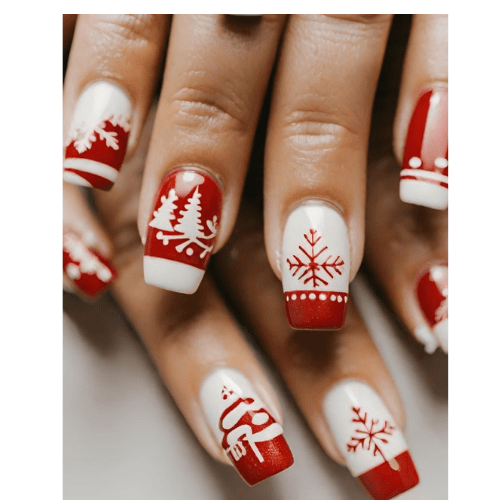
- Base Coat: Apply a transparent base coat first to shield your nails from damage and make sure the polish goes on smoothly. Let it dry entirely.
- Red Base Color: Use a vivid red lacquer for the base color of your nails. Give it some time to dry, and if it’s not completely opaque, add another coat. When applying a new coat, wait until the previous one has dried completely.
- White Accent Nails: Pick out a single or double nail (like the ring finger) to highlight with white. Create a dramatic contrast by painting their nails with a pure white lacquer.
- Festive Patterns: Use a white nail art pen or a little brush to create festive patterns like snowflakes, dots, or straight lines on the remaining red nails. Put your imagination to work and decorate each nail with a unique design.
- Reverse Accent Nail: Inverse the color scheme if you have two accent nails. Using a small brush or a white nail polish striper, paint red candy cane stripes on the remaining white nails.
- Top Coat: Apply a Clear Top Coat to Seal and Enhance Shine. Make sure to cover the entire design with this clear top coat. Do not touch the top coat until it has dried entirely.
- Clean-Up: To remove excess nail polish and smooth up the edges of your festive designs, dip a little brush into nail polish remover.
4. Reindeer Santa Suit Nails:
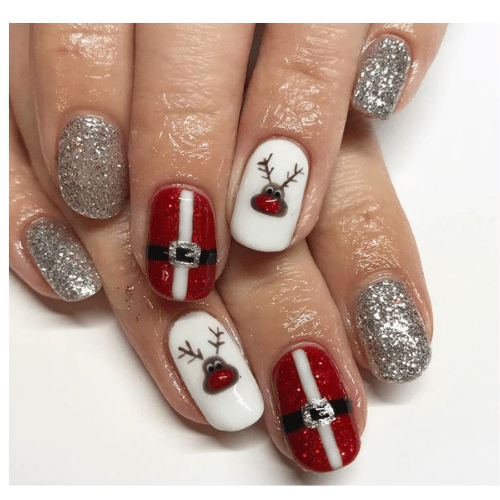
- Base Coat: To prevent damage to your nails and to prepare them for polish, use a transparent base coat. Make sure to let it dry completely.
- Red & White Base Colors: As a foundation color, paint your nails in alternating red and white polish. Apply two coats and let each one dry entirely to achieve full coverage.
- Reindeer Silhouettes: Cute little reindeer silhouettes can be made on the red nails using a little brush or a nail art pen. Dip them in black, white, and red nail paint, correspondingly, for the antlers, eyes, and noses. The reindeer need to air dry.
- Santa Suit Accent Nails: Pick two accent nails, typically the ring fingernails. Cover them in crimson nail paint so they look like Santa Claus’s costume. Hang on while the red polish dries.
- White Belt Detail: Adorn the Santa suit nails with a delicate white belt across the center. Make a tiny square or rectangle in the middle with a black nail art pen or varnish to serve as the belt buckle.
- Reindeer Details: Add subtle elements, such as red noses and white patches, to the reindeer silhouettes to make them stand out. For finer control, try using a toothpick or a dotting tool.
- Top Coat: Applying a clear top coat will seal your festive nail design, adding a glossy look and protecting the polish. You should wait until the details are dry before adding the final layer.
- Finishing Touch: Rinse off any extra nail paint and smooth down any rough edges with a little brush soaked in nail polish remover.
5. Greens & Reds Christmas Nail Design:
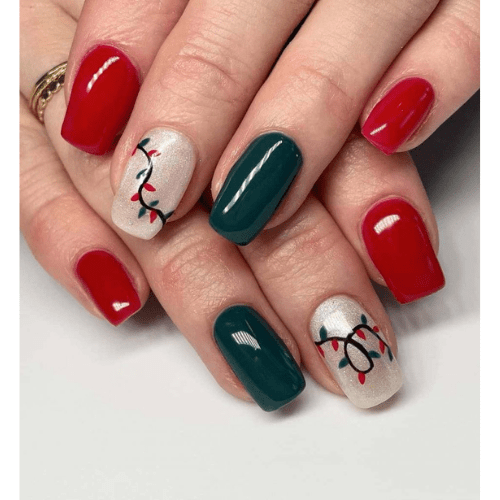
- Base Coat: To protect your nails and make sure the polish goes on smoothly, apply a clear base layer first. Let it dry entirely.
- Green Base Color: As a base coat, paint your nails a festive green polish. If necessary, apply two coats and let each one dry completely before applying the next.
- Red Accents: To add a pop of red, paint one or two nails (such as the ring finger) a certain shade. Add a pop of color by painting these nails with a vibrant red varnish.
- White Details on Green Nails: Add some festive white accents to the green nails using a white nail art pen or a tiny brush. You can make snowflakes, dots, or simple lines. Put your imagination to work and decorate each nail with a unique design.
- Green Details on Red Nails: Finish off the red accent nails with some green accents. Patterns inspired by the holidays, such as holly leaves or Christmas trees, could be included. For extra-fine detailing, try using a nail art pen or a tiny brush.
- Glitter Accent Nail: Pick out one fingernail to add some glimmer. Get in the Christmas spirit with a coat of red or green glitter polish.
- Top Coat: Apply a Clear Top Coat to Seal and Enhance Shine. Make sure to cover the entire design with this clear top coat. Do not touch the top coat until it has dried entirely.
- Clean-Up: To remove excess nail polish and smooth up the edges of your festive designs, dip a little brush into nail polish remover.
This holiday season, step up your nail game with our carefully chosen collection of Top Christmas Nail design tutorials! Show off step-by-step tutorials on how to make beautiful holiday nails, like snowflakes and Santa suits. Explore the magic of nail art to make your hands look like a beautiful display of holiday cheer.